Home » Baby Monitor » How To Assemble Baby Bouncer? Here Are 5 Easy Steps
How To Assemble Baby Bouncer? Here Are 5 Easy Steps
As an Amazon Associate, I earn from qualifying purchases.
When you buy a bulky item, such as a baby bouncer, the manufacturer can’t send it to your house without disassembling it into little parts. And they may charge more fees to assemble it. So why don’t you do it yourself?
Our instructions on how to assemble baby bouncer are just for reference since they are the most basic steps. You can speed up the process if you follow our guide together with the handbook. Let’s dive right in!
Before you start putting the bouncer together, make sure that you have all of the necessary pieces. Different models of baby bouncers will have different attachments. The list below comprises the essential parts of a baby bouncer and is offered as a reference.
Seat Pad.
Right Backrest Tube.
Left Backrest Tube.
Connector.
Footrest Wire.
Headrest.
Left Base Frame Wire.
Right Base Frame Wire.
Rear Base Frame Tube.
Toy Bar With Toys.
Music/Vibration/Soothing Unit.
How To Assemble Baby Bouncer? 5 Easy Steps
To make the perfect bouncer for your little angel, you need to follow these five steps: build the frame, install the battery, construct the seat pad, assemble the toy bar, and connect the headrest to the seat pad.
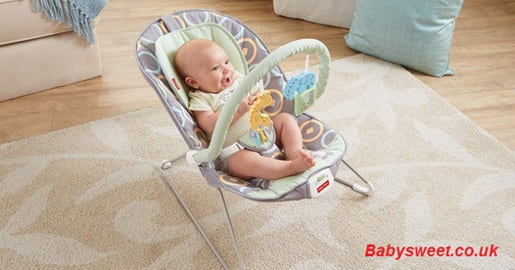
Baby bouncer
Step 1: Build The Frame
Place the rear base frame tube on the ground and hold up the plastic corner.
Put the right and left base frame wires into the rear base frame tube and push the plastic connectors down until they fit snugly into the base frame wires.
Connect the left and right backrest tubes at their ends and press them together until they click into place.
Place the footrest wire’s ends into the matching holes on the backrest tube hubs until they form an even oval shape.
Insert the ends of the base frame wires into the corresponding holes on the backrest tube connector to secure the upper frame assembly to the frame base. Check to see that each side snaps into place.
Step 2: Install The Battery
Remove the battery cover using a screwdriver and install batteries while replacing the battery cover. Remember not to over tighten the screw.
Align the unit’s mounting groove with the footrest wire’s corresponding slot and put the device into the mounting groove until it’s fully secure.
Step 3: Construct The Seat Pad
To put the seat pad into the frame, unbuckle the straps on the rear of the seat pad.
Pull the front edge of the seat pad over the music/vibration unit after placing the top of the seat pad over the backrest tube.
Pull each rim of the seat pad over the footrest wire until the bouncer frame is snugly covered.
Fasten the straps on the rear of the seat pad to the frame to secure it, and make sure you hear a “click” before heading to the next step.
Step 4: Assemble The Toy Bar
Attach the toy bar on top of the bouncer.
Install the toy bar’s ends into the toy bar socket by pushing both sides into corresponding holes on the frame.
Step 5: Connect The Headrest To The Bouncer
Use the adjustable hook and loop strap to secure the headrest to the bouncer.
Thread it through the headrest hoop from front to rear.
Adjust the hook by detaching and reattaching it, then placing it at the proper height.
Now you may test it with your baby to check whether it works properly. Place your little one gently in the bouncer seat and fasten the straps. And then adjust the straps to ensure that the baby feels comfortable laying in it.
Some Tips For Assembling Baby Bouncer
To assemble your baby bouncer, you might need a lot of open floor space, which is usually considerably more than you expect. It’s less likely that you’ll kick pieces around and lose them if you give yourself enough area.
Check all the parts that come with the baby bouncer. If you notice something is missing, contact the company as soon as possible. And when you are taking inventory of all the parts, lay everything out in separate locations and keep comparable things together in the same pile.
The installation of various bouncer models will require the use of specialized tools. If you don’t have the correct ones, reach the company for advice or buy the tools in case you need to repair your baby’s bouncer later.
The same is true for the battery. Because different bouncers require different types of batteries to function properly. Keep in mind that various batteries, as well as old and fresh ones, should not be mixed. This may have an impact on the product’s efficiency.
After every step, compare your current part with the manual illustration to see if you did it correctly. You don’t want to restart the process when you are on step 4, don’t you?
How to assemble baby bouncer? We have the answer for you. Putting parts together can be fun and meaningful to your newborn. We hope you find these instructions helpful, and good luck assembling your baby bouncer.